How to Create Issues
Once the above specifics have been determined, the Admin or Dev can enter the information into JIRA.
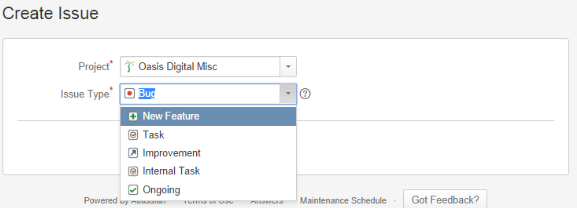
From the top menu bar, select Issues–>Create Issue. From the Project pull-down menu, select the correct Project for this Issue, then do the same for the Issue Type.
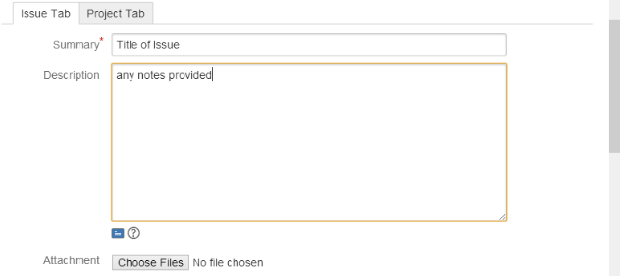
For Summary, type the Title of the Issue as provided to you. The Project code (BP, LDB, etc.) and an original and sequential number for this particular issue will be automatically generated.
Sometimes the author of an Issue will have customer notes, screen shots, or other documentation to support the work. At this time, you should add any of those items under Description or Attachment.
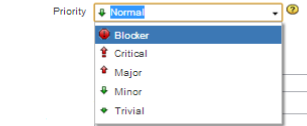 Typically, the Priority will be Normal. If not, the manager or customer will tell you otherwise.
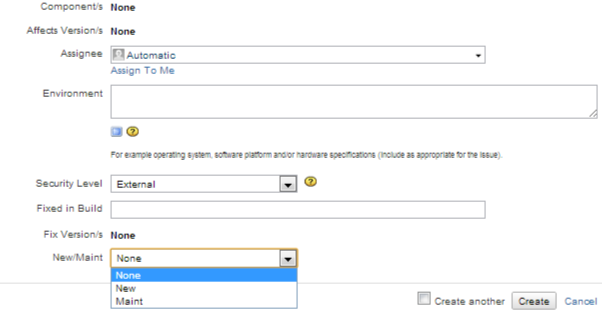
The Assignee is the developer who will be primarily responsible for this Issue. This information will be provided by the manager or lead developer. If it is you, then just select “Assign to Me”. The pull-down menu will display some personnel options as well as a type-in field.
Generally, the Security Level will be External, meaning that the customer representative can view the progress of this issue. Occasionally, an issue might be created for Internal access only, but this would be clearly specified by the initiator.
For certain customers, we must also determine the New/Maint field. If you are entering an issue for such a customer, read the title and description of the issue to determine whether it is New–adding a new feature, service, way of doing business or Maint (Maintenance)–improving or correcting an existing feature or functionality, adding or deleting customers, reformatting data already in use. Please refer to documents applying to the customer for more detailed guidelines. Message a manager or the issue developer if you are still unsure.
Upon making that selection, press the Create button to complete. If you will be creating multiple Issues in one session, check the Create another box to go directly to a fresh creation page.

