
Jira Portfolio tips and tricks

With the release of Jira Portfolio 2.0, Atlassian has unlocked some high level reporting features that were previously either completely unavailable to users, or required advanced levels of development work to attain. With the new customizable hierarchy, large amounts of epics and projects, extending for months or years at a time, can now be tracked. However, the setup process can still be tricky. Understanding the limitations that exist in Portfolio, and some strategies to work around them, is very important to optimize your use.
This guide will be an overview for setting up a Plan. It includes some tips for the individual elements I’ve encountered while setting up Portfolio installations for various clients over the past few months.
Setting up your first Plan
Contrary to popular belief, a Plan is not a single landing point for data, like a Project is. Rather, it’s more like a set of instructions for Portfolio to pull in data from various sources, be it Boards, Projects, or Filter results. Multiple Plans can share similar sets of data, or one Plan can contain data no other Plan contains. It is a higher level container for data to be seen, but that data still needs to come from somewhere else within Jira. Portfolio can be used to create Issues, but those Issues also need to have a source Project through Jira. Portfolio can never live as a standalone product, it still needs to be connected to a Jira instance. When starting a Plan, remember the following:
- If creating a new Plan against an existing filter, that filter will need to be shared with the appropriate teams or groups beforehand, or data will not appear properly. This can
be especially troublesome if you are loading a Plan from multiple filters at once, and only some have been configured properly for everyone, resulting in information not sharing accurately across the board. - If creating a Plan against a board, make sure it’s an existing Scrum board. This will ensure that you have access to not only all your data, but it will automatically calculate velocity based on previous releases.
Adding items to your plan
You can always create new items inside your plan by Selecting the + sign
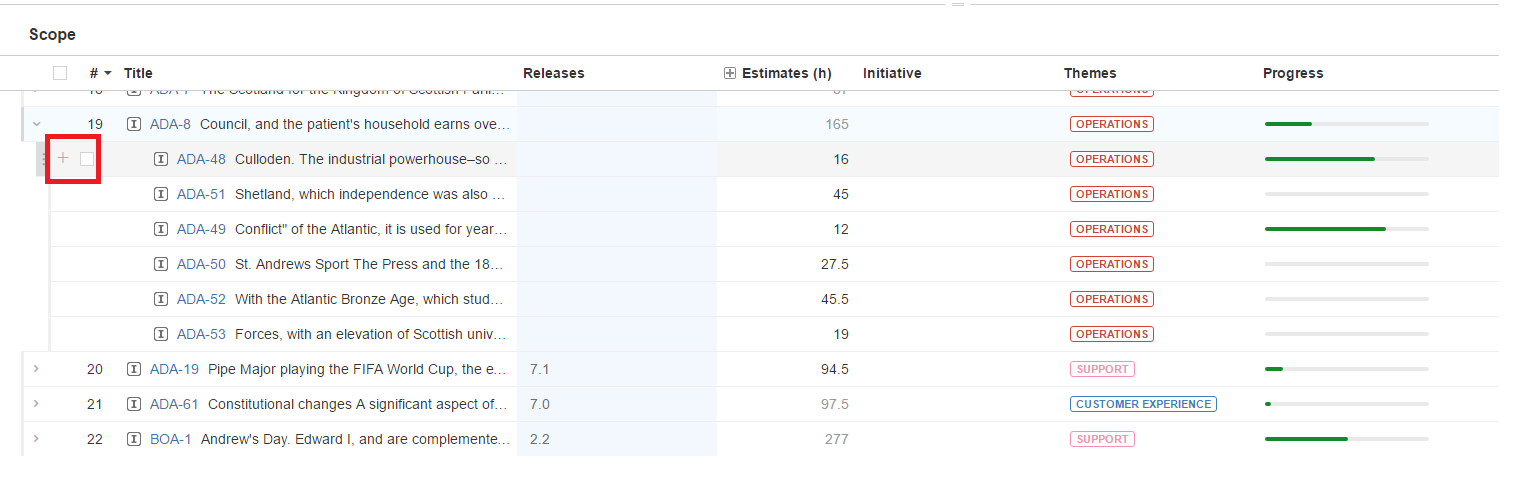
While this is a great, easy way to create new Issues on the fly, remember that all Issue creation will not take place until you actually commit the changes. I can’t tell you how many times I’ve gone searching for Issues I’ve created within Jira, but not committed in Portfolio.
Also, it’s important to remember to pay close attention to your hierarchy placement. You won’t be able to build a child within Portfolio off of a subtask, for example. Conversely, creating an item within your standard Jira instance will require a reload of your Portfolio
Infinite Hierarchy?
One of the most touted features of Portfolio is it’s ability to break the boundaries of Jira’s standard Hierarchal limitations. Let’s take a look at the Hierarchy configuration panel by clicking the Portfolio dropdown, then Administration. We should then be presented with your application Administration Page, and we’re going to click “Portfolio Hierarchy Configuration”, on your left:
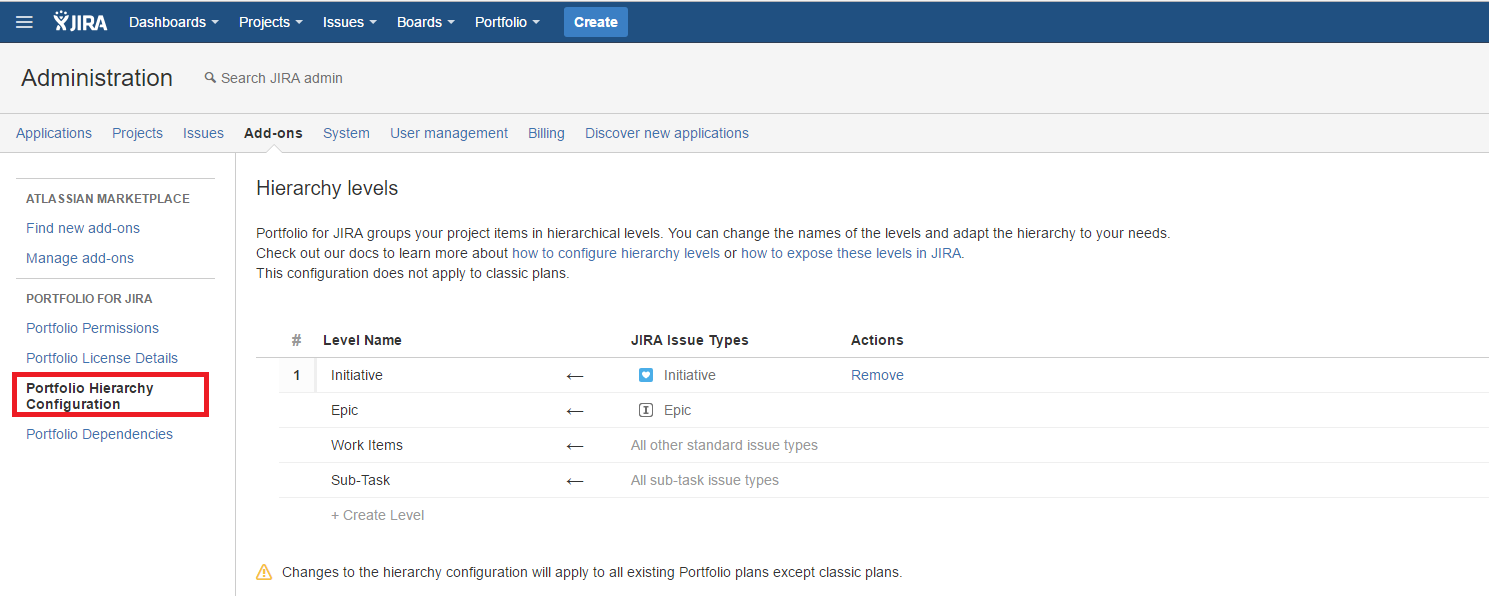
This seems pretty straightforward, but where a huge area of confusion comes from is the expectation that you are altering the configuration of your Jira Hierarchy, which is incorrect. Even though we are placing the “Initiative” Issue Type at the top of the Hierarchy here, it doesn’t create a new level. Jira itself still only has 2 levels, Standard and Sub-task, with a special link connection for Epic. If you’re planning on doing all your planning through Portfolio, that’s great. But reporting outside can become a hassle. For example, if I asked you to tell me every issue Michael looked at under a specific Epic you would probably tell me that’s not a problem, and throw a JQL query at me that simply searches for all issues created by Michael with a specific epic name. The problem is that (currently) that same kind of functionality is not available for searching under these additional levels of Hierarchy created in Portfolio. It’s important to keep this in mind, as the special link that Epics have with Stories underneath them doesn’t currently exist with Initiatives and other types. It’s a bit of granular reporting that is absent at the moment.
Configuring Working Hours and Days
It might be expected that each person on a team would contribute 8 hours a day, making this an easy setup. However this is rarely the actual case. Typically speaking, users have meetings, are pulled aside for small conversations, and will rarely put 8 full hours a day on a project as a result of this. I find that 6 hours per day is far more realistic and will provide managers better data. You can always create two different plans based on the same set of data, then alter working hours via the config, and compare to how they stack up to reality until you have a better idea of how your teams work.
You can change this option on  Configure > Working Hours and Days
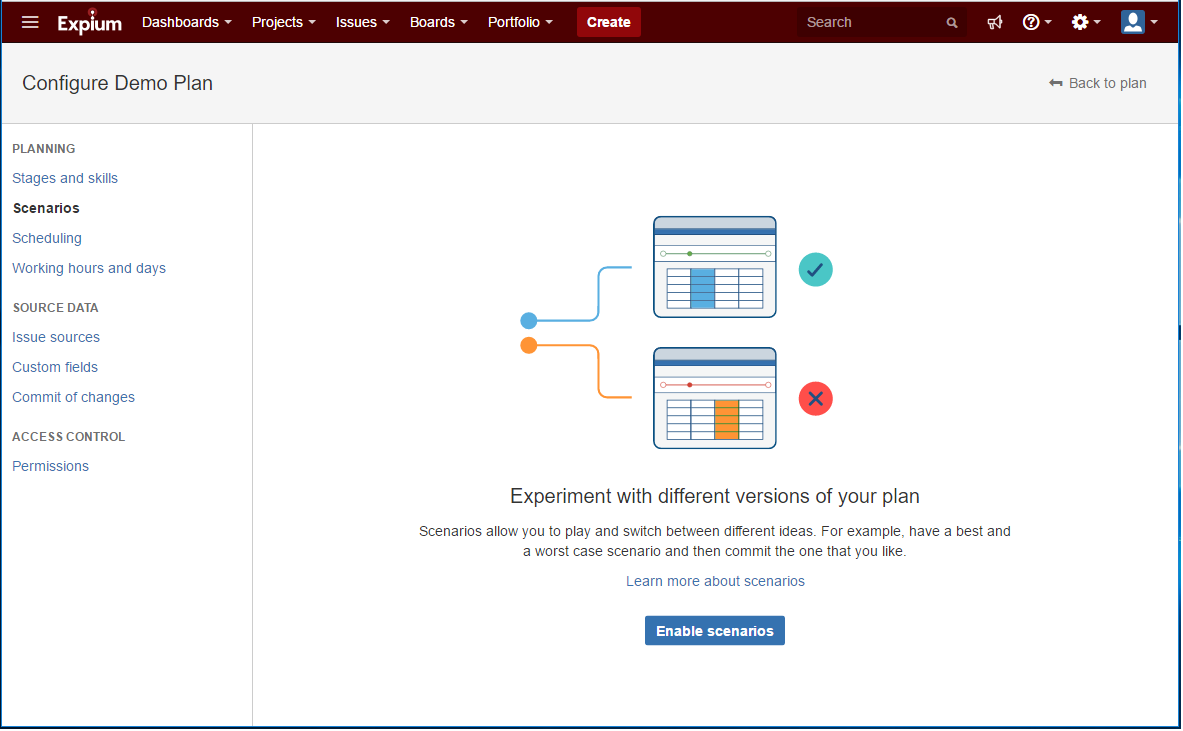
Multiple Scenarios
Better than that, you can utilize the Multiple Scenario feature to create identical plans with different options such as velocity, teams, etc. Here’s How:
1. Go to your original Plan’s configuration page, where you’ll be presented with an option to enable configuration of Multiple Scenarios. Choose to enable it.
2. As you can see, the Initial Scenario is created, which is your original Plan. Click the “Create Scenario” link.
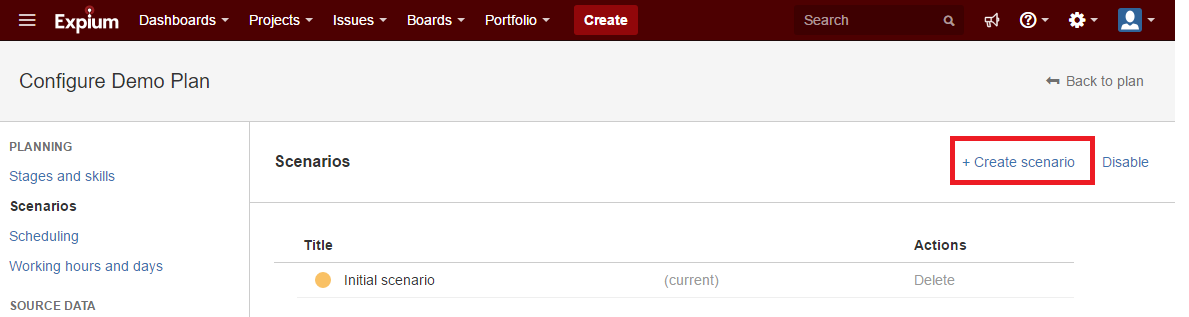
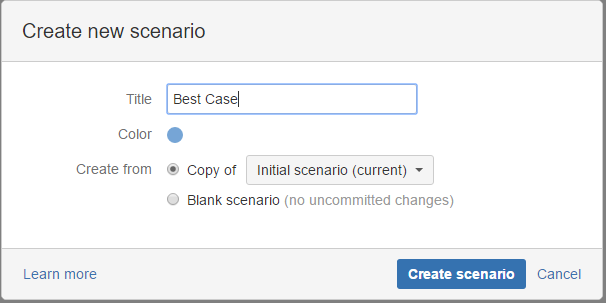
3. On the next popup, choose a name for your Best Case Scenario (or however you’d like to track your alternate scenario) and choose to copy your initial scenario.
4.Now switch to your newly created Plan, with this new dropdown, and alter any options you wish.
IMPORTANT: Plan configuration is not configurable on the Scenario level, meaning that all Scenarios will share the same configuration.
I hope these notes on my first few months working deeply with Portfolio help save you a bit of time. Please be sure to check back again soon for another set of tips and tricks, and please reach out to an Expium team member if you’d like help configuring you or your company’s instance.