
How to Create an Issue

To create a new JIRA issue:
- Click the button ‘Create’ in the menu bar at the top of the screen (the quick keyboard shortcut is simply ‘c’).

- On the Create Issue dialog box, select the applicable project and issue type.
- Choose a Summary for the issue, and complete any required fields (marked with an asterisk), as well as any pertinent fields.
- If you want to change the fields that are shown within the dialog box:
- Select the ‘Configure Fields’ button in the top right of the dialog box.
- Select ‘Custom’ and click the checkboxes of the fields you want to show or hide, or click ‘All’ to show all fields.
- When you create your next issue, JIRA will remember your previously chosen fields.
- Click the ‘Create’ button when you have filled out all the necessary fields to your satisfaction.
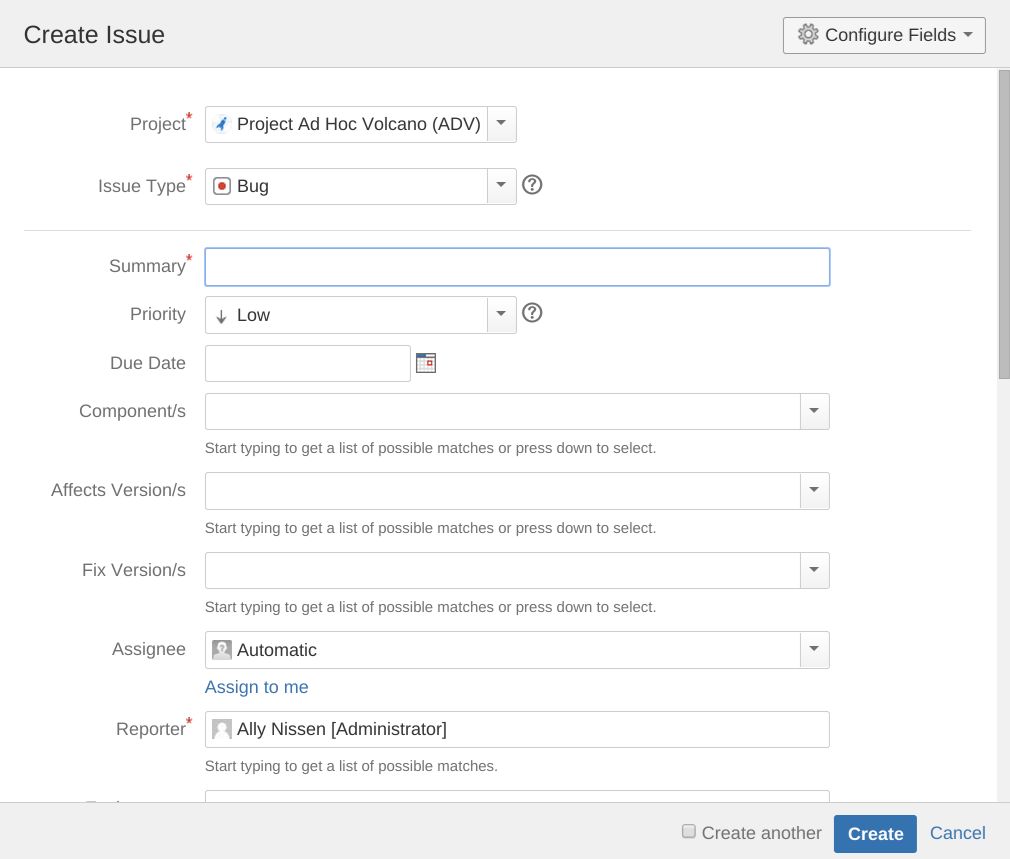

A new ‘Create Issue’ box will appear if you selected the ‘Create another’ checkbox (depicted above). If you configured your dialog box to be pre-populated, double check all fields to ensure they are correct before creating the next issue.
Tips:
- Mentioning other users in the Comment or Description fields will prompt an email to be sent to said user’s email address (registered with their account) after clicking the ‘Update’ button.
- You can link other issues, insert images or macros, and more in certain text fields for an issue.
- To see a list of all the issues that you have created that have not been resolved, select your username and click ‘Profile’, then click ‘Filters’ -> ‘Reported & Open’.
- Depending on the ‘Autowatch’ setting in your user profile, you may accordingly become a ‘watcher’ of the issues you create (in Administration -> System -> User Preferences).